
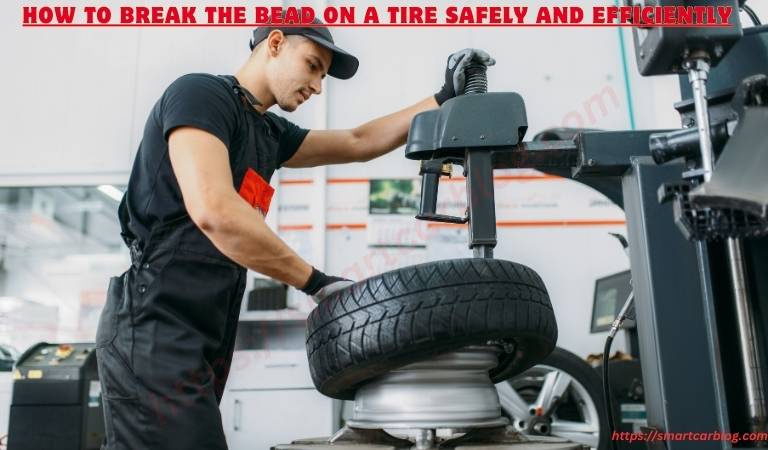
If you’ve ever wondered how to break the bead on a tire, you’re not alone. This crucial step in tire maintenance can be the difference between a quick fix and a prolonged hassle. With the right technique and a bit of insider knowledge, what seems like a specialized task is accessible to anyone.
Whether you’re faced with an emergency flat or simply switching to seasonal tires, understanding the bead-breaking process is invaluable. Imagine possessing the ability to handle your tire changes with ease, never again at the mercy of service station timelines or costs. We’ll guide you through the bead-breaking technique, showing you how to swiftly and safely separate the tire from the rim, empowering you with the capability to take charge of your vehicle’s tire maintenance.
So, let’s dive in. Keep reading to unlock the straightforward steps to break a tire bead, equipping you with practical skills that will last a lifetime. Say goodbye to dependency on roadside assistance and hello to self-reliance.
Table of Contents
ToggleUnderstanding the Basics of a Tire Bead
When it comes to tire maintenance and replacement, one essential skill that often goes unnoticed is understanding how to break the bead on a tire. This fundamental step is crucial for anyone looking to handle tire issues themselves. Whether you’re a seasoned mechanic or a DIY enthusiast, mastering this technique is a game-changer.
What is a Tire Bead?
The tire bead is the inner circle of a tire that is made of steel wires and rubber, designed to fit snugly against the wheel rim. This creates an airtight seal, allowing your tire to hold air under pressure. It’s what keeps your tire firmly attached to the rim and plays a pivotal role in safe tire performance. However, when you need to replace a tire or fix a leak, you’ll need to know how to break this bead effectively.
The Importance of Breaking the Bead Correctly
Breaking the bead on a tire might sound like brute force work, but it’s actually a task that requires finesse and understanding. Doing it correctly is crucial because improper techniques can damage the tire or wheel, leading to safety issues or costly repairs. It’s a skill that stands between a straightforward maintenance job and an avoidable trip to the auto shop.
When Do You Need to Break a Tire Bead?
You might need to break a tire bead in several scenarios, such as changing a tire, fixing a flat, or even applying a tire sealant to a leak. It’s also a necessary step during the tire recycling process. Understanding how to break the bead on a tire safely ensures that when the time comes, you’re prepared to tackle the task with confidence.
Each of these steps is critical in tire maintenance and safety. As you familiarize yourself with how to break the bead on a tire, you’ll be better equipped to handle your tire-related challenges, ensuring a smoother ride and peace of mind. Stay tuned as we dive deeper into each aspect of this essential automotive care process.
Preparing to Break the Bead on a Tire
When it’s time to tackle tire repairs or replacements, preparing to break the bead on a tire is a crucial first step. Adequate preparation ensures not only the success of the task but also your safety. Let’s explore what you need in terms of tools, safety measures, and environmental assessment to get the job done right.
Essential Tools and Equipment
To successfully break the bead on a tire, having the right tools and equipment at your disposal is crucial. Here’s a list of essential items you’ll need:
Bead Breaker Tools
To effectively break the bead, you’ll need the right tools. A bead breaker tool is specifically designed for this job, allowing you to apply focused pressure to the bead and separate it from the rim without damaging either component. There are various types of bead breakers, from manual to hydraulic ones. Depending on the frequency of use and the type of tires you’re dealing with, choose a bead breaker that best suits your needs.
Safety Gear and Precautions
Before you begin, it’s imperative to gear up with the right safety equipment. Protective gloves and safety glasses are non-negotiable to guard against potential harm from flying debris or accidental slips. Furthermore, always conduct this task in a well-ventilated area to avoid inhaling any fumes released during the process.
Step-by-Step Preparation Guide
Preparation is key to breaking the bead of a tire efficiently:
- Gather all necessary tools, including the bead breaker, tire irons, a compressor, and a valve core removal tool.
- Clear your workspace to ensure you have ample room to maneuver around the tire.
- Remove the valve core to deflate the tire completely—this reduces tension and makes the bead easier to break.
- Inspect the tire and rim for any signs of damage that could complicate the process.
By following these preparatory steps, you’re setting yourself up for a smooth bead-breaking experience.
Assessing Your Work Environment
Your work environment plays a pivotal role in how safely and effectively you can break the bead. Ensure the area is flat and stable, providing a secure base for the tire and your tools. Good lighting is essential for visibility, and if you’re working outdoors, be mindful of weather conditions that could affect the task at hand.
By paying attention to these details, you’re not just preparing to break the bead on a tire—you’re ensuring the job is done efficiently and safely, paving the way for successful tire maintenance or replacement.
The Step-by-Step Guide to Breaking a Tire Bead
Breaking the bead of a tire is a necessary skill for any DIY enthusiast or professional working with vehicles. Whether you’re prepping for a tire change or addressing a puncture, the process requires precision and know-how. This guide walks you through the steps to break the bead on a tire, ensuring you can accomplish this task with confidence.
Positioning the Tire for Bead Breaking
Begin by laying the tire flat on a solid, stable surface. Remove the valve stem cap and the core to deflate the tire fully. This step is vital to relieve any pressure that could make bead breaking more difficult and potentially hazardous.
The Manual Method to Break a Tire Bead
The manual method of breaking a tire bead is a traditional and hands-on approach that involves using tire irons and physical effort to separate the tire from the rim. Here’s a step-by-step guide on how to break a tire bead using the manual method:
Using a Bead Breaker Tool
- Place the bead breaker tool against the tire’s bead. Ensure it is snug against the rim to avoid slippage.
- Apply force to the handle or lever, depending on your tool type. This will push the bead away from the rim.
- Work your way around the tire’s circumference, repeating the process until the bead is completely broken.
Alternative Manual Techniques Without Special Tools
If you don’t have a bead breaker, there are other ways to separate the tire bead from the rim manually:
- Stand the tire upright and place a sturdy board or plank across the tire’s tread.
- Drive a vehicle slowly up onto the board, applying weight gradually until the bead breaks from the rim.
- Rotate the tire and repeat the process to ensure the bead is free all around.
Using a Hydraulic Bead Breaker
For larger or more stubborn tires, a hydraulic bead breaker can save time and effort:
- Position the hydraulic bead breaker so its ram is against the bead.
- Activate the hydraulic mechanism, which will push the bead away from the rim with significant force.
- Follow the tool’s specific instructions to move around the tire and fully break the bead.
Tips for Avoiding Damage to the Tire and Rim
- Always work slowly and steadily; rushing the process increases the risk of damaging the tire or rim.
- Make sure tools are correctly positioned and are not making contact with the rim to prevent scratches or dents.
- Inspect the tire and bead breaker tool for damage or debris before proceeding to ensure a clean separation.
Note: By following these detailed instructions, you can master how to break the bead on a tire with methods ranging from manual to hydraulic. With patience and the right technique, you’ll maintain the integrity of both tire and rim, ensuring a safe and efficient process.
Safety Tips and Best Practices
When dealing with tire maintenance, particularly when learning how to break the bead on a tire, adhering to safety protocols must be balanced. From personal protection to ensuring the longevity of your tires and rims, following best practices is paramount. Here’s how to approach the bead-breaking process with safety and care at the forefront.
Personal Safety During the Bead-Breaking Process
The safety of the individual performing the bead break is the first and most critical consideration. Here are some essential safety tips:
Wear Protective Gear: Always use heavy-duty gloves to protect your hands from abrasions and impact. Safety glasses are also a must to shield your eyes from any debris.
Proper Ventilation: Perform the bead-breaking process in a well-ventilated area, especially if you’re using any chemical lubricants or solvents.
Use Correct Tools: Employ tools designed for bead breaking to prevent accidents and injuries.
Maintain Stability: Ensure the tire is securely placed on a flat surface to avoid slippage or rolling during the bead-breaking process.
Be Mindful of Pressure: Even a deflated tire can create dangerous forces; always ensure complete deflation before beginning.
Ensuring the Longevity of Your Tires and Rims
Breaking the bead on a tire should not shorten the life of your tires or rims if done correctly. To maintain their longevity:
Avoid Metal-to-Metal Contact: Use protective covers on metal tools to prevent scratching or gouging the rims.
Follow Manufacturer Guidelines: Stick to the tire and rim manufacturers’ recommendations for bead breaking to avoid damage.
Regular Inspection: Check for any damage or wear on your tires and rims before and after the bead-breaking process. Early detection of issues can save costs in the long run.
Use Lubrication: Apply an appropriate lubricant to ease the bead-breaking process and minimize friction that can cause wear.
Common Mistakes to Avoid
Common pitfalls can turn a routine tire maintenance task into a costly affair. Here are some to steer clear of:
Overlooking Tire Deflation: Only attempt to break the bead after fully deflating the tire first. Residual air pressure can be dangerous.
Ignoring Tool Instructions: Each bead breaker tool comes with its specific set of instructions — disregarding these can lead to tool misuse and potential harm.
Rushing the Process: Take your time. Rushing can result in mistakes that may damage the tire rim or cause personal injury.
Neglecting Safety Gear: Skipping out on safety gear might seem convenient but can have dire consequences.
By incorporating these safety tips and best practices into your routine, you can safely and successfully break a tire bead, preserving both your well-being and the integrity of your tires and rims. Remember, understanding how to break the bead on a tire is as much about the technical steps as it is about the approach to the task — always prioritize safety and precision.
Also Read: How to Let Air Out of Tire – Expert Tips and Techniques!
Also read: How Long Does a Tire Plug Last?
Troubleshooting Common Issues
In the process of breaking a tire bead, you might encounter a few hurdles. These challenges can range from stubborn beads that refuse to break to malfunctions with your tools. Here’s a troubleshooting guide to help you navigate these issues efficiently.
Dealing with Stubborn Beads
Stubborn beads can be the bane of any tire-changing endeavor. When faced with a bead that won’t budge:
- Double-Check Deflation: Ensure the tire is completely deflated. Any remaining air can keep the bead seated against the rim.
- Apply Lubricant: Use a bead lubricant along the rim edge to help ease the bead off. Soapy water can also work as a makeshift solution.
- Increase Force Gradually: If you’re using a manual bead breaker, increase the Force gradually but firmly. Patience here is key; the bead will eventually give way.
- Heat it: Sometimes, applying gentle heat can make the rubber more pliable, easing the process. Be cautious with this approach to avoid damaging the tire.
Addressing Bead Breaker Tool Malfunctions
Bead breaker tools are sturdy but can sometimes fail. If you find yourself with a malfunctioning tool:
- Inspect for Visible Damage: Look for any bent or broken parts. Simple issues can often be fixed with basic tools.
- Check Hydraulic Fluid Levels: If you’re using a hydraulic bead breaker, low fluid levels can impede function. Refill as necessary, following the manufacturer’s guide.
- Review the User Manual: The user manual may have a troubleshooting section specific to common issues with the tool.
- Maintenance Check: Regularly clean and maintain your bead breaker tool to prevent future malfunctions.
When to Seek Professional Help
There are times when it’s best to call in the pros:
- Persistent Bead: If you’ve tried all methods and the bead still won’t break, it might be time to consult a tire professional. This is especially true for larger or more specialized tires.
- Tool Issues Beyond Basic Repair: If your bead breaker tool has issues you can’t fix with basic troubleshooting, professional repair services or a replacement might be in order.
- Safety Concerns: Whenever you feel that the task is beyond your skill level, especially if there’s potential for injury or significant damage to your tire or rim, professional assistance is the safest bet.
Breaking a tire bead only sometimes goes as planned, but with these troubleshooting tips, you’re better prepared to tackle common issues. Whether it’s how to break the bead on a tire or managing the tools involved in the process, remember that safety and patience are your best allies. If ever in doubt, there’s no harm in seeking help from a tire service professional to ensure the job is done right.
After Breaking the Bead: Next Steps
Successfully breaking the bead on a tire is just part of the tire maintenance or replacement process. Once you’ve accomplished this, it’s crucial to follow through with proper inspection, preparation for the next steps, and responsible disposal if the tire is no longer usable. Here’s how to proceed after breaking the bead.
Inspecting the Tire and Rim Post Bead Breaking
After you’ve separated the tire from the rim, a thorough inspection is vital:
- Examine the Rim: Look for any signs of damage like bends or cracks. Addressing these issues now can prevent future problems.
- Check the Tire: Assess the tire for any tears, punctures, or excessive wear that could warrant its replacement.
- Confirm Bead Integrity: Ensure the bead area of the tire, which sits on the rim, is free from tears or damage to guarantee a good seal when remounted.
Preparing the Tire for Mounting or Disposal
Whether you’re remounting the tire or preparing for its disposal, taking the right steps is important:
- Mounting: Clean the bead area and the rim to ensure a clean contact surface. Apply bead sealer if necessary, and always follow the tire manufacturer’s guidelines for inflation and mounting.
- Disposal: If the tire is no longer safe for use, make sure to follow your locality’s regulations for tire disposal. Many service centers accept old tires for a small fee and will handle the recycling process.
Proper Disposal of Old Tires
Disposing of old tires responsibly is crucial for environmental conservation:
- Recycling Centers: Look for local tire recycling centers. Tires can be reused into a variety of materials, including rubber mulch for landscaping and playgrounds.
- Municipal Waste Programs: Some local governments offer tire collection days where you can drop off old tires for free or at a nominal charge.
- Upcycling: Consider repurposing your old tires into DIY projects like garden planters or outdoor furniture.
After breaking the bead, taking these steps not only ensures a smoother continuation of your tire maintenance but also contributes to environmental sustainability. Whether you’re prepping for a new tire or saying goodbye to an old one, doing it correctly is key to maintaining your vehicle’s safety and performance.
DIY vs Professional Bead Breaking
Determining between a DIY approach and seeking professional services for breaking the bead on a tire can hinge on various factors. Understanding when to call in the experts and conducting a cost-benefit analysis can guide you to the best choice for your situation.
When to Consider Professional Services
While many vehicle enthusiasts are adept at handling their maintenance, including bead breaking, there are times when professional services are the wiser choice:
- Complexity of the Tire: Some tires, such as run-flat tires or those with stiff sidewalls, can be particularly challenging. Professionals have the right tools and expertise for these specialized situations.
- Lack of Proper Tools: If you do not have access to the appropriate bead-breaking tools, attempting a DIY could result in damage to the tire or rim.
- Safety Concerns: If you’re unsure about the safety procedures for bead breaking, it’s prudent to seek professional help rather than risk personal injury or property damage.
- Time Constraints: When time is of the essence, a professional can complete the job instantly and efficiently.
Cost-Benefit Analysis of DIY vs Professional Services
Evaluating the costs and benefits involves more than just comparing prices:
- Initial Investment: DIY requires an initial investment in tools and equipment, which may be substantial. However, these tools can be used multiple times, making DIY more cost-effective in the long run.
- Your Time Value: Consider the value of your time. If the time spent learning and performing the task outweighs the cost of professional services, the latter might be the better option.
- Potential for Damage: DIY mishaps can lead to costly repairs. Professionals are less likely to damage your tire or rim and often have insurance to cover accidents.
- Learning Opportunity: Doing it yourself can be a valuable learning experience, leading to savings on future tire maintenance.
Weighing these factors will help you decide whether to embark on the DIY route or to rely on professional services. For those willing to invest the time and effort, DIY bead breaking can be a rewarding and cost-saving skill. On the other hand, professional services offer convenience and peace of mind, especially for those less experienced or facing complicated bead-breaking situations.
Conclusion
Conquering the task of breaking the bead on a tire is an essential skill for any DIY enthusiast or automotive professional. Throughout our comprehensive guide, we’ve delved into the intricacies of the bead-breaking process, examined the tools required, and discussed the importance of doing so with care to avoid damage to both the tire and the rim. We’ve also explored when it might be better to seek professional help and the costs involved in DIY versus professional services.
Remember, whether you choose to break the bead manually or with specialized tools, the key lies in patience and precision. Ensuring you’re equipped with the right knowledge and equipment will make the process smoother and safer. While it can be tempting to rush through the maintenance routine, taking the time to break a bead properly can save you from potential headaches down the road.
For those who decide to take on this challenge themselves, the satisfaction of a job well done is undeniable. However, it’s also crucial to acknowledge when a task is beyond personal expertise, as the professionals are always there to assist with their know-how and specialized toolsets.
As you move forward, keep in mind the safety tips, best practices, and troubleshooting advice provided. They can be the difference between a successful bead break and an unfortunate mishap. And when in doubt, always consult with a tire expert to guide you through the process.
Breaking the bead on a tire doesn’t have to be a daunting task. With the guidance provided, we hope you feel prepared to tackle this challenge, boosting your maintenance skills and ensuring your vehicle’s tires are in top condition.
FAQs About Breaking the Bead on a Tire
Q: What do I need to break the bead on a tire?
A: It would help if you had a bead breaker tool, which can be a lever-type, hydraulic, or even a manual bead breaker. Ensure you have protective gloves and eyewear for safety.
Q: Can I break a tire bead at home without professional equipment?
A: Yes, you can use a sturdy flat-head screwdriver or a pry bar coupled with a good deal of elbow grease to push the bead away from the rim manually. However, using specialised tools is recommended for efficiency and safety.
Q: What are the steps to break the bead on a tire?
A: First, deflate the tire completely. Place the bead breaker tool against the bead and apply pressure until the bead separates from the rim. Work your way around the tire until the bead is entirely broken.
Q: How long does it take to break a tire bead?
A: It varies, but with the proper tools and technique, you can typically break the bead in just a few minutes.
Q: What safety precautions should I take when breaking a tire bead?
A: Always wear safety goggles and gloves to protect your eyes and hands. Ensure the tire is fully deflated and secured to prevent it from moving during the process.
Q: Why is it so hard to break the bead on my tire?
A: Tire beads can become very stiff, especially on older tires or due to corrosion on the rim. Applying a lubricant can sometimes ease the process, but using the right tool is the key to success.
Q: Can I damage my tire or rim while breaking the bead?
A: If you apply too much force or use the wrong tools, you risk damaging the rim or the tire itself. Always follow proper guidelines and use tools as intended to prevent damage.
Q: Do I need to remove the tire from the vehicle to break the bead?
A: Yes, for safety and accessibility, you should always remove the tire from the vehicle before attempting to break the bead.
Q: Is there a specific type of bead breaker for different tires?
A: Bead breakers come in different sizes and designs, suitable for various tire types, from small car tires to large truck tires. Choose one that matches the size and requirements of your tire.
Q: After breaking the bead, how do I remove the tire from the rim?
A: Once you break the bead, use tire irons or a tire-changing machine to pry the tire off the rim. Take care to do this gently to avoid any damage to the tire or the wheel.
 Welcome to SmartCarBlog.com! I’m Rashel Miajee, The proud founder of smartcarblog.com. This is a part of